Antique mirror looks forgiving. The mottled, aged surface seems like it should hide small mistakes. It doesn’t. The distressing that makes the product attractive also leaves the silver and backing thinner, patchier and more exposed than they are on a standard mirror, and that changes how you have to measure, cut, finish, drill, store and fit it.
This guide walks through the seven places where antique mirror jobs most often go wrong, with a short, direct answer at the start of each section so you can find what you need quickly.
Key Takeaways
- Antique mirror is silvered glass with a deliberately distressed coating, so the coating is more vulnerable at edges, holes and any surface break.
- Most failures show up months after installation as dark creep along the edges, not on the day of fabrication.
- Seal every cut edge, including drilled holes and cut-outs, and never let coolant, cleaners or the wrong adhesive touch the backing.
- Plan pattern direction and panel sequence before you cut, not after.
- Always cross-check cutting side, coolant, edge sealer and adhesive against your mirror supplier’s technical data sheet.
What Is Antique Mirror, and Why Does It Fabricate Differently?
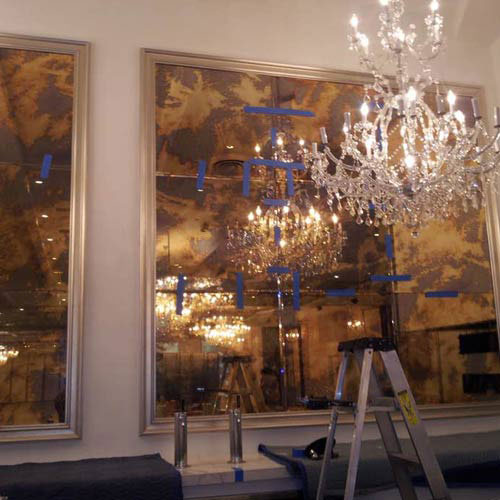
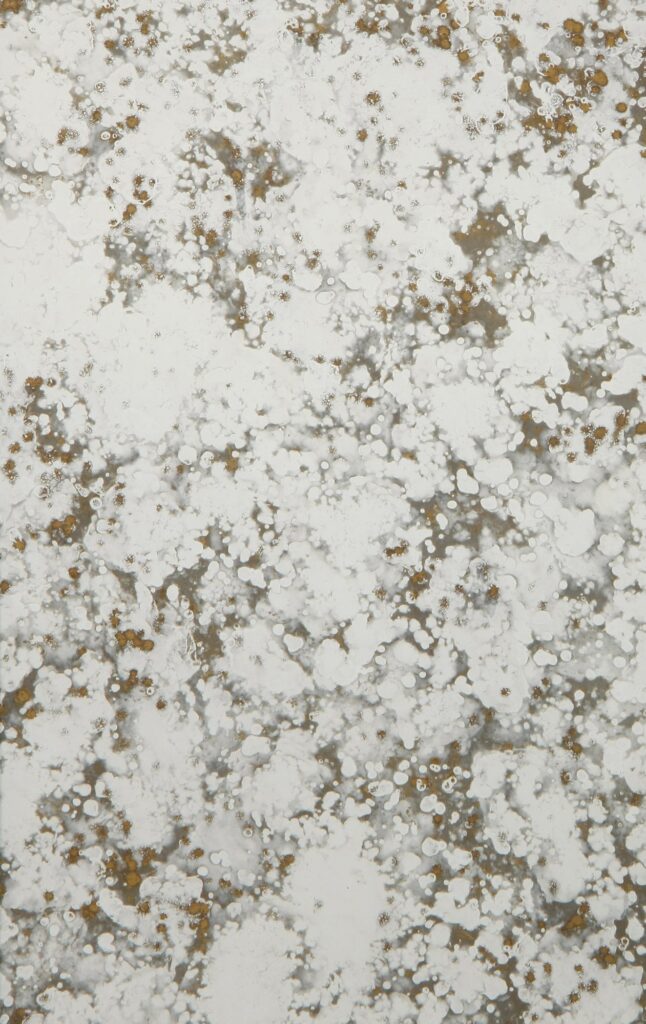
Antique mirror is a silvered mirror whose reflective layer and protective backing have been intentionally aged, usually by selectively removing or breaking up the coating to create clouding, spotting, or a worn, smoky look. Because that coating is thinner in places and more exposed at the edges, it is less tolerant of moisture, chemicals and mechanical stress than standard mirror.
A standard mirror is a fairly uniform product. Silver, copper (on some products), and paint layers sit evenly across the glass. In an antique mirror, parts of that stack have been thinned or cleared on purpose. That’s the look, but it’s also the weakness. Anything that attacks the backing, whether it is water, alkaline cleaners, acetic-cure silicone or coolant that has soaked under the paint, will do more damage, faster, and in a more visible way.
Two other points are worth knowing before you start. First, antique mirror can’t be toughened after silvering, because the heat would destroy the coating, so any safety requirement has to be met another way, typically with a safety backing film. Second, pattern and tone vary between sheets and batches, so what you buy and in what order it is cut matters more than it does with plain mirror.
Quick Reference: Where Problems Start and How to Prevent Them
| Stage | Typical problem | Main prevention |
|---|---|---|
| Measuring | Pattern mismatch between panels, wrong cut size | Site-verify, map panel sequence, allow for edge work |
| Cutting | Coating chips, shelling on the score line | Clean table, sharp wheel, one confident pass |
| Edge finishing | Black edge, delamination | Controlled grinding, clean coolant, seal the edge |
| Drilling | Backing damage, breakout, exposed hole walls | Support the sheet, light feed, seal every hole |
| Handling | Face scratches, backing scuffs | Gloves, vertical carriers, non-abrasive spacers |
| Surface protection | Moisture and chemical attack in transit | Protective film, edge guards, dry packing |
| Installation | Backing attacked by adhesive or damp substrate | Neutral-cure, mirror-safe adhesive; dry, sealed substrate |
1. How Do You Measure Antique Mirror Accurately?
Measure on site, not from drawings, and treat pattern continuity as part of the measurement. For antique mirror you are fixing both the dimensions and the position of each panel in the sheet, because the distressing is visible in the finished wall.
Walls and substrates in the kind of projects that specify antique mirror, such as restaurants, hotel lobbies, bars and feature walls, are rarely square. Check diagonals, measure at the top, middle and bottom, and look at plumb. If the opening is out by a few millimetres, you want to find out before the glass is cut.
Then think about the edges. Work out what the finished size needs to be after seaming or polishing, then allow for any rebate in a frame, joint widths between panels, and clearance for movement. It’s much easier to take a few millimetres off the layout on paper than to recut a panel that has already been distressed to order.
For multi-panel installations, pattern matters as much as size:
- Cut panels from the same batch, and where possible from the same sheet, so tone and distressing read as one surface.
- Mark each panel with its position and orientation as soon as it’s cut. A simple layout sketch taped to the rack saves arguments later.
- Allow for higher wastage than you would with plain mirror. Pattern direction and sheet-to-sheet variation limit how freely you can nest the cuts.
2. How Should You Cut Antique Mirror?
Cut on a clean, debris-free table with a sharp, correctly lubricated wheel, make a single confident score, and follow your supplier’s guidance on which side to score from. The aim is a clean break without lifting or chipping the coating along the line.
Mirror is already less forgiving to cut than clear float. The coating can chip or shell along the score, and in antique mirror the areas next to a distressed patch have less adhesion to hold on to. A tiny chip on a plain mirror is cosmetic; here it can become the starting point for corrosion.
A few habits help:
- Wipe the table down between sheets. Glass fragments and swarf scratch both the face and the backing.
- Keep cutting oil off the backing. Residue that gets under a panel can migrate toward the edge and cause problems later.
- Score once. Going back over a line often causes shelling.
- Test on an offcut when you start a new product or a new supplier. Different backing systems behave differently, and the data sheet is the final word on cutting side and technique.
3. Why Is Edge Finishing So Critical on Antique Mirror?
Edges are where antique mirror usually fails, because the silver and backing are exposed at the cut and moisture or chemicals can creep in behind the coating. Controlled finishing followed by proper edge sealing is the single most effective way to prevent black edge and delamination.
Black edge, the dark line that slowly spreads in from the edge of a mirror, is the complaint that comes back to the workshop. It rarely appears at handover. It appears after a winter of condensation, a year of cleaning with the wrong spray, or a damp substrate behind the panel.
What to consider at the edge:
- Profile. A flat polished or seamed edge is easier to seal and keeps less moisture than a deep bevel, which exposes more coating and gives water somewhere to sit.
- Process control. Overheating, aggressive grinding or dirty coolant can chip the coating back from the edge or push moisture under it. Keep coolant clean and filtered, and keep feed rates steady.
- Sealing. Apply a mirror-compatible edge sealer after finishing, especially for bathrooms, spas, kitchens, coastal sites and any frameless installation where the edge stays visible and exposed.
- Record keeping. Note the edge specification, including sealing, on the work order. If someone re-grinds an edge later, they need to know it has to be resealed.
4. What Should You Watch for When Drilling Antique Mirror?
Drill with the sheet fully supported, use clean coolant and light feed pressure, keep holes well away from edges, and seal every drilled hole and cut-out. Each hole is another exposed edge with the same corrosion risk as the perimeter.
The geometry rules are the same as for any annealed glass. As a general guide, the hole diameter shouldn’t be smaller than the glass thickness, and the hole edge should sit at least about twice the glass thickness from the nearest glass edge, with holes kept a similar distance apart. Check your own workshop standards and the supplier’s limits, because these are minimums, not targets.
On antique mirror, a few extra points apply:
- Support the backing side to limit breakout and coating damage as the drill exits, and follow the manufacturer’s advice on which side to drill from.
- Don’t let slurry sit on the backing. Rinse and dry promptly.
- Seal the hole wall once it’s drilled, the same way you’d seal an edge.
- Use non-metallic sleeves, washers or gaskets under fixing hardware, so metal never bears directly on the glass or the coating.
- Confirm hole positions against the frame or substrate layout before you drill, not after.

5. How Do You Handle and Store Antique Mirror Without Damage?
Handle sheets with clean gloves on vertical carriers, separate them with non-abrasive, non-acidic interleaving material, and store them on edge on padded racks in a dry, ventilated space. Both the face and the backing mark easily, and distressed areas show handling damage more than a flawless finish would.
It sounds basic, but a lot of damage happens in the gap between delivery and the cutting table. A few rules that are worth enforcing:
- Inspect on receipt and record any transit damage before processing starts, so it is clear who is responsible.
- Don’t drag sheets across each other. Lift and separate.
- Keep sheets away from wet processing areas, and never wrap or crate damp glass.
- Store on padded A-frames or racks, off the floor, in a temperature-stable area.
- Avoid stacking in a way that puts the backing of one sheet in hard contact with the face of the next.
6. How Do You Protect the Surface During Processing and Transport?
Keep the glass face and backing protected from the moment fabrication finishes until the mirror is on the wall. Use protective film where it’s compatible, edge guards and rigid packaging for transport, and neutral cleaners only. Moisture and aggressive chemicals are the main enemies of the backing.
Many antique mirror complaints trace back not to the workshop but to the time between the workshop and the finished wall. A beautifully finished panel can be marked on a delivery van or attacked by the cleaning products on a building site.
Practical steps:
- Apply a removable protective film to the face where the product allows, and check that it won’t leave residue.
- Use edge protection and rigid crating or A-frames for transport. Don’t let panels rub against each other in transit.
- Wipe off all water, coolant and slurry before packing, so no moisture is sealed in against the backing.
- Avoid ammonia-based cleaners, strong alkalis, acids and solvent cleaners. Use a neutral cleaner on a cloth rather than spraying directly onto the mirror, so liquid doesn’t run into the edges.
- Label every panel with orientation and sequence, so installers can follow the layout you planned in step one.
7. What Installation Conditions Does Antique Mirror Need?
Antique mirror needs a flat, dry, sound and sealed substrate, a mirror-safe neutral-cure adhesive, and a fixing detail that allows for movement and, where possible, ventilation. Even a perfectly fabricated panel can fail if the wall or adhesive attacks the backing.
Fabricators and installers don’t always get to pick the conditions, but you can set out the requirements in writing and hand them over with the delivery.
- Substrate. It should be flat, dry and sealed. Moisture or alkalinity in a fresh plaster or cement-based wall can reach the backing.
- Adhesive. Use only adhesives or silicones that are specifically labelled as safe for mirror backing and approved by your supplier. Acetic-cure silicones and some solvent-based mastics are well known for attacking mirror coatings and causing blackening.
- Ventilation and wet areas. Where the design allows, leave a small air path so moisture isn’t trapped behind the panel. In wet areas, seal edges and substrate carefully, and check that the product is suitable for the environment.
- Support and tolerance. Allow for thermal movement and building tolerance in fixings and joint widths, and make sure fixings are suitable for the weight of the glass thickness specified.
- Safety. Mirrors in certain locations, such as near doors, in gyms, or low-level installations, may need safety backing or an impact-rated product under local codes. Check the requirements for the project early.
- Aftercare. Pass on cleaning and maintenance advice with the delivery. A one-page note that says “neutral cleaner, on a cloth, never spray the edges” can prevent a lot of callbacks.
A Pre-Fabrication Checklist for Antique Mirror
Use this before you release a job to the shop floor:
- Site dimensions verified, diagonals checked and edge allowances confirmed
- Panel sequence and pattern direction mapped, with panels marked as cut
- Cutting side, coolant and sealer confirmed against the supplier’s data sheet
- Edge profile, hole positions and cut-outs agreed, with sealing noted on the work order
- Protective film, edge guards and packaging planned
- Safety backing or impact requirements checked for the location
- Adhesive, substrate and cleaning advice written up for the installer
Frequently Asked Questions
What causes black edge on antique mirror?
Black edge is corrosion of the silver and backing that starts at an exposed edge. Moisture, aggressive cleaning products, unsealed edges, damp substrates and incompatible adhesives are the usual causes. Sealing the edges and using mirror-safe materials during installation is the best protection.
Can antique mirror be tempered?
Not after it has been silvered. The heat of the tempering process would destroy the coating. If a project needs safety performance, a safety backing film or a suitable laminated or safety-rated product is normally used instead, depending on local code and the supplier’s options.
Should antique mirror edges be sealed?
Yes. Every cut edge, including drilled holes and cut-outs, should be sealed with an edge sealer that is compatible with the mirror backing. This matters most in humid spaces and in frameless installations where the edge is exposed.
Can antique mirror be used in bathrooms or other wet areas?
It can, with care. Choose a product the supplier rates for the environment, seal all edges and holes, use a moisture-resistant substrate, and keep the mirror clear of direct water exposure where possible. Poorly sealed antique mirror in a damp room is the classic recipe for black edge.
What adhesive is safe for fixing antique mirror?
Use a neutral-cure silicone or mirror mastic that is specifically labelled as safe for mirror backing and approved by the mirror supplier. Avoid acetic-acid-cure silicones and solvent-based adhesives that aren’t rated for mirror.
How do you clean antique mirror safely?
Use a neutral glass cleaner on a soft cloth, and apply it to the cloth rather than spraying the mirror, so liquid doesn’t run into the edges. Avoid ammonia, strong alkaline or acidic cleaners and abrasive pads.
How do you match the pattern across multiple antique mirror panels?
Order enough material from one batch, cut panels in sequence from the same sheet where possible, and mark each panel’s position and orientation straight after cutting. A layout map and clear labelling carry the plan through to installation.
Is antique mirror harder to fabricate than standard mirror?
It is less forgiving. The same equipment is used, but tolerance for mistakes is lower, because the coating is already thinned and any chip, moisture path or chemical contact is more likely to turn into visible damage.
Final Thoughts
Fabricating antique mirror is mostly about respecting its weak points. Measure with the pattern in mind, cut and finish carefully, seal every edge and hole, keep the backing away from moisture and the wrong chemicals, and make sure whoever fits the glass knows what it needs from the wall and the adhesive.
Do that consistently and the product does what the specifier hoped it would: it ages beautifully on the wall, rather than prematurely on the edges.
If you’re planning a decorative mirror project in New York or New Jersey and want to talk through fabrication details before you specify, the Bear Glass team is happy to help.